I teach needle felting and use it a lot in my own work. I have often been asked for needlefelting tutorials. This will be the first of many.
Needle felting is a form of felting using a barbed needle (no this won’t work with just any needle) to matt the fibers together. It is important to use a foam block at least 7cm high, this is to protect the surface you are working on. The needle is very sharp and hurts a lot when you miss your work and hit your finger (do not chatter at same time as felting, and always keep your eye on the needle.) I am of course speaking from experience.
Equipment

You will need.
1 or 2 felting needles
(they are quite brittle and can break especially when you are just beginning)
Assorted Cookie Cutters
Merino tops/roving in assorted colours
Foam base or brush base as found in craft shops.
Plasters…just incase.

Fill your cookie cutter withe merino and push it in slightly. It will go down a lot when felted.

With the cookie cutter filled with merino on top of the foam, begin to needlefelt. Hold your needle upright and push it in and out of the merino, (being careful not to hit the side of the cookie cutter) in a pricking action. Do not do it to slowly as this can cause the needle to snap. You need a nice constant stabbing motion with the needle always staying upright.
Needlefelt until the fibers start to matt together, it can take a little while. Make sure you hold the cookie cutter on the outside.

Take your bird out of the cookie cutter and turn the cookie cutter over then turn the bird over and place back in the cookie cutter. This is to felt the back of it, if you feel there are some bits that are to thin you can top it up with more merino. Continue felting this side until it forms a solid piece of felt in the shape of a bird (or whatever shape you have used). You can keep taking it out and turning it over until you are satisfied.
It should look like this.

I then added some colour to the bird and an eye using the merino. You can take it out of the cookie cutter to do this and just work on it as normal. If you have not needlefelted before, you could try felting some patterns on a plain piece of felt to get the feeling of ‘painting’ with the merino.
You only need to use small bits at a time to add to the surface of your bird. It is amazing how easy it is do to this bit.

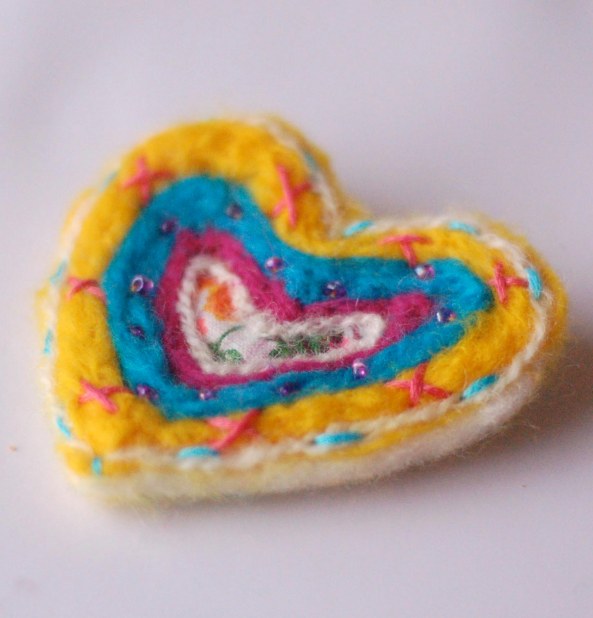
Once I was satisfied with the colours I added some simple embroidery stitches.

I am not entirely pleased with this one and may need to experiment a bit with colours…but thats the fun of it. The thing about crafting is not be afraid of not doing your best first time especially if your are learning a new skill. Take what you’ve learned from each piece and move onto the next. I will be having fun this week experimenting with my assorted cookie cutters I was lucky enough to pick at a Flea market on Sunday.
I made this swallow from another one.

I hope this tutorial is helpful do let me know if you enjoyed it 🙂